
Photography
Setting Up Your DSLR for Capturing Stunning Star Photos
Astrophotography is an exciting hobby that allows you to capture the beauty of the night sky. With a DSLR camera, you can take amazing photos of stars, planets, and even galaxies. However, taking clear and detailed star photos requires the right setup and camera settings. In this guide, we will go step by step to help you set up your DSLR for star photography.
-
Choose the Right Camera and Lens
A DSLR camera with manual settings is best for astrophotography. Choose a camera that allows you to adjust ISO, shutter speed, and aperture manually. For the lens, a wide-angle lens with a large aperture (like f/2.8 or lower) is ideal because it lets in more light. Prime lenses (fixed focal length) often provide sharper images compared to zoom lenses. If you plan to capture deep-sky objects, consider using a telephoto lens or a telescope adapter for better magnification.

When choosing a camera and lens for astrophotography, certain models perform better due to their low-light capabilities and manual control options. Here are some recommended cameras and lenses:
Recommended DSLR and Mirrorless Cameras for Astrophotography
- Canon EOS 6D Mark II – Full-frame sensor with good low-light performance.
- Nikon D750 – Excellent dynamic range and high ISO capabilities.
- Sony A7 III – Mirrorless full-frame camera with great night photography features.
- Canon EOS R6 – Advanced mirrorless option with excellent noise control.
- Nikon Z6 II – Strong performance in low-light conditions.
Recommended Lenses for Astrophotography
- Rokinon 14mm f/2.8 – Affordable wide-angle lens with a large aperture.
- Sigma 20mm f/1.4 DG HSM Art – Sharp lens with a fast aperture for night photography.
- Tamron 15-30mm f/2.8 – Versatile zoom lens with excellent image quality.
- Canon RF 16mm f/2.8 STM – A great budget-friendly wide-angle lens.
- Nikon 14-24mm f/2.8 S – High-quality zoom lens for astrophotography.
These cameras and lenses help capture more light, reduce noise, and produce sharp images of the night sky. Let me know if you need recommendations for a specific budget!
-
Use a Sturdy Tripod
A sturdy tripod is essential for capturing clear and sharp star photos. Since astrophotography requires long exposure times, any small movement can cause blurriness in your images. A heavy-duty tripod prevents unwanted vibrations and ensures stability, especially in windy conditions. Look for a tripod made of aluminum or carbon fiber for durability. Adjustable legs and a ball head mount make it easier to position your camera correctly. Avoid using cheap or flimsy tripods, as they may not provide the necessary stability for long-exposure photography.

Here are a few sturdy tripods that are great for astrophotography:
Budget-Friendly Options
- Amazon Basics 60-Inch Tripod – Affordable, lightweight, and good for beginners.
- Manfrotto Compact Action Aluminum Tripod – A solid entry-level tripod with good stability.
Mid-Range Tripods
- Benro Mach3 TMA28A – Durable aluminum build with strong support for DSLR cameras.
- Vanguard Alta Pro 2+ 263AB100 – Offers excellent flexibility and stability.
High-End Tripods
- Manfrotto 190XPRO4 – Professional-grade, very stable for long exposures.
- Gitzo GT3543LS Systematic Tripod – Premium carbon fiber tripod with extreme durability.
-
Find a Dark Location
Light pollution from streetlights, buildings, and cars can make it difficult to capture stars clearly. The best way to get sharp and bright star photos is to find a dark location with minimal artificial light. Look for national parks, rural areas, or designated dark sky reserves where the sky is clearer. Avoid shooting near cities, as light pollution washes out faint stars.
You can use online tools like Dark Site Finder or Light Pollution Maps to locate the best dark sky areas near you. Choosing a new moon night also helps reduce interference from moonlight.

-
Set the Camera to Manual Mode
Setting your camera to manual mode is crucial for astrophotography. Automatic settings are designed for normal lighting conditions and may not work well in low-light environments. In manual mode, you can adjust the shutter speed, ISO, and aperture to capture as much light as possible. This allows you to control the exposure and get the best results. Disable auto white balance and instead use a preset like daylight or tungsten for better color accuracy.
Also, turn off image stabilization if your camera or lens has it, as this can cause unwanted blurring during long exposures.

-
Adjust the Camera Settings
Here are the key settings to adjust:
- ISO: Set your ISO between 800 and 3200. Higher ISO values make the camera sensor more sensitive to light but can also introduce noise. Experiment with different ISO settings to find the best balance.
- Aperture: Use the widest aperture your lens allows (lowest f-number, such as f/2.8 or f/1.8). This allows more light to enter the camera.
- Shutter Speed: Set the shutter speed between 10 and 30 seconds. Longer shutter speeds capture more light but can cause star trails due to the Earth’s rotation. If you want sharp stars, use the “500 Rule” (divide 500 by your focal length to get the maximum shutter speed in seconds).
- Focus: Autofocus does not work well in the dark. Switch to manual focus and set your lens to infinity (∞). You may need to fine-tune it by using live view and zooming in on a bright star.
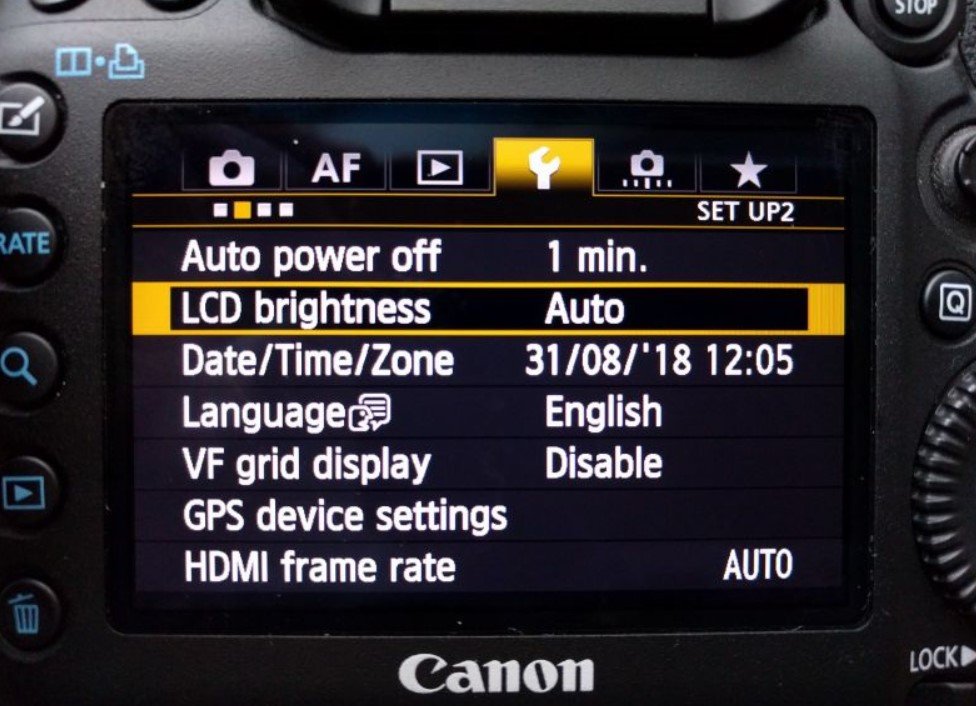
Image Source: Biblino
-
Use a Remote Shutter or Timer
Pressing the shutter button manually can cause slight vibrations, leading to blurry photos. To avoid this, use a remote shutter release or set your camera’s timer to 2 or 10 seconds. A remote shutter release allows you to trigger the camera without touching it, ensuring stability. If you don’t have one, using the built-in timer is a good alternative. This small adjustment helps capture sharper images, especially during long exposures required for astrophotography.
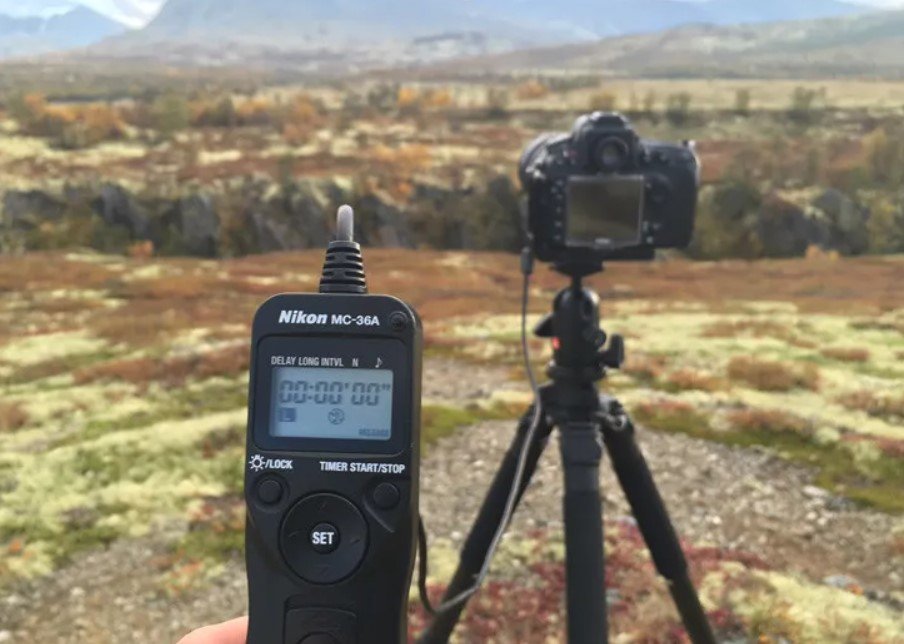
Image Source: Digital Photography School
-
Shoot in RAW Format
Shooting in RAW format is important for astrophotography because it captures more details and preserves image quality.
RAW files store unprocessed data from the camera sensor, allowing better adjustments during editing. Unlike JPEG, RAW images retain more color depth and dynamic range, making it easier to enhance stars, reduce noise, and adjust brightness without losing quality.
Using RAW gives you greater flexibility in post-processing.

Image Source: Photo Retouching Services
-
Enable Noise Reduction
Most cameras have a “Long Exposure Noise Reduction” setting. Turning this on can help reduce noise in your photos, especially when using high ISO values.
Enabling noise reduction on your DSLR or mirrorless camera helps reduce graininess in long-exposure photos. Here’s how you can turn it on:
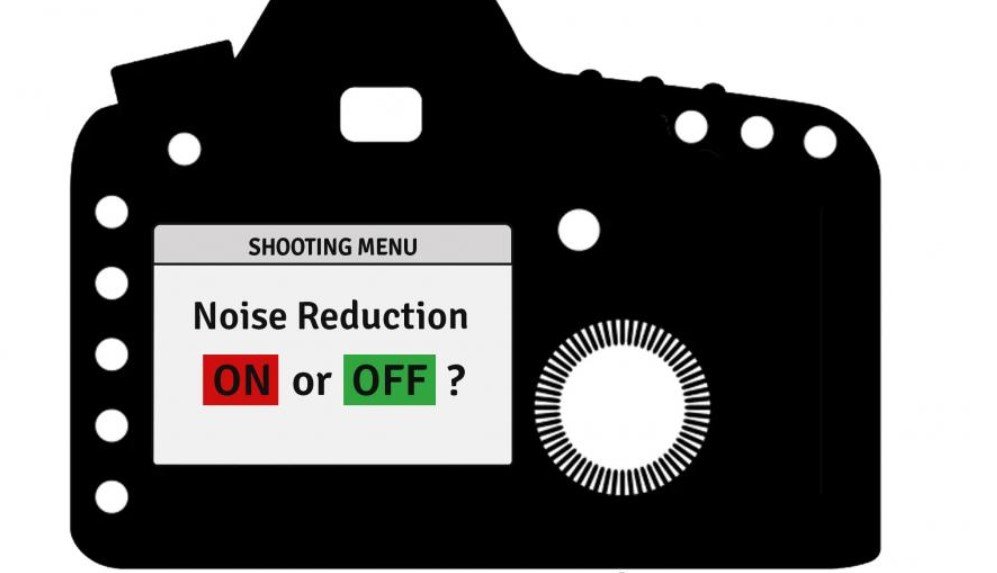
Image Source: Neat Video
For Canon Cameras:
- Press the Menu button.
- Navigate to the Custom Functions or Shooting Settings tab.
- Look for Long Exposure Noise Reduction or High ISO Noise Reduction.
- Select On or Auto (some models may have multiple levels like Low, Standard, or High).
- Press OK or Set to confirm.
For Nikon Cameras:
- Press the Menu button.
- Go to the Photo Shooting Menu.
- Find Long Exposure NR (Noise Reduction).
- Choose On to enable it.
- Press OK to save the settings.
For Sony Cameras:
- Press the Menu button.
- Go to the Camera Settings tab.
- Select Long Exposure NR or High ISO NR.
- Choose On to enable it.
- Exit the menu to save changes.
This setting helps improve image quality, but keep in mind that enabling it may slightly increase processing time after each shot.
-
Check and Adjust
Take a test shot and check the image on your camera’s LCD screen. If it looks too dark, increase the ISO or use a longer shutter speed. If the stars appear blurry, adjust the focus slightly. Keep making small adjustments until you get a clear and bright image.
-
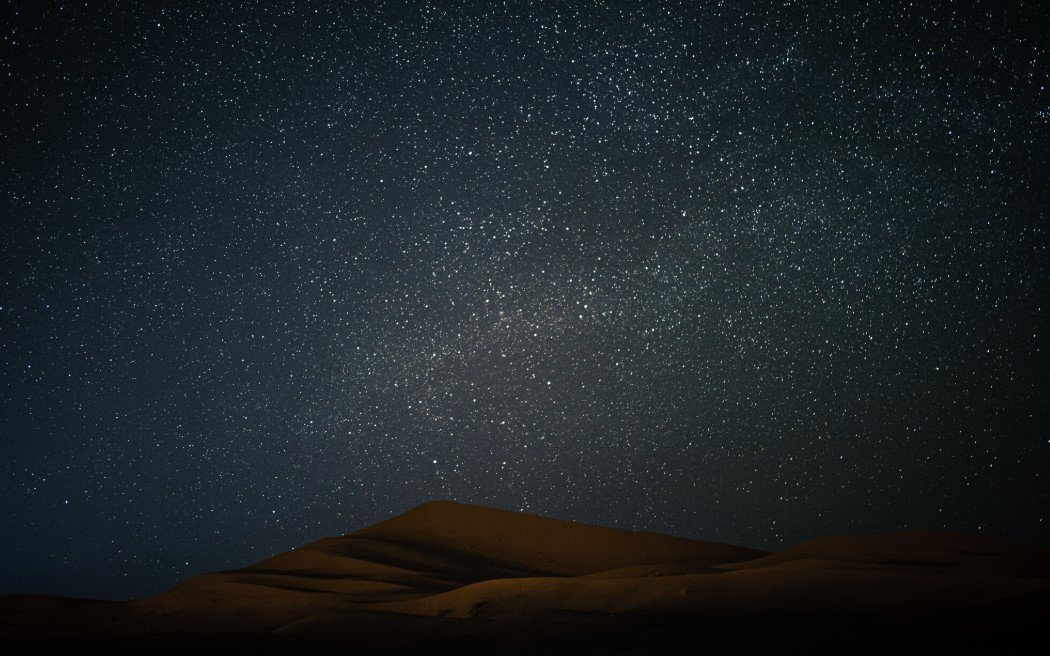
Experiment with Composition
A good composition makes your star photos more interesting. Try including a silhouette of trees, mountains, or buildings in the foreground. You can also capture the Milky Way by pointing your camera toward the densest star cluster in the sky.
-
Edit Your Photos
Post-processing can enhance your star photos by bringing out details, adjusting brightness, and reducing noise. Use photo editing software like Adobe Lightroom or Photoshop to fine-tune your images.

Image Source: momothexplorer
-
Be Patient and Practice
Astrophotography requires patience and practice. The more you experiment with different settings and techniques, the better your star photos will become.
Final Thoughts
Capturing the stars with your DSLR camera is a rewarding experience. By following these steps, you can take beautiful night sky photos. Remember to find a dark location, use a sturdy tripod, set your camera manually, and experiment with different settings. With practice, you will improve your skills and capture stunning images of the stars.


Best 7 Mainframe Modernization Companies for Cloud Migration (AWS, Azure, GCP)

Best Site Selection Software for Retail Expansion: A Data-Driven Guide

Why One Thermostat Can’t Keep The Whole House Comfortable?

Understanding the Investment in Hair Treatments