
DIY
How to Disassemble a Recliner Chair: Step-by-Step Guide

Disassembling a recliner chair might seem daunting, but with the right approach and tools, it can be a straightforward process. This guide will provide you with step-by-step instructions on how to take apart a recliner chair, ensuring you can do it efficiently and safely.
Understanding the Basics
- Before diving into the disassembly process, it’s essential to understand the basic components of a recliner chair.
- Familiarizing yourself with parts like the backrest, footrest, levers, and bolts will make the process smoother.
Safety First
- Always ensure that you’re working in a well-lit and spacious area.
- Lay down a soft cloth or mat to prevent any damage to the chair or your floor.
- Wear protective gloves to safeguard your hands from sharp edges or pinching mechanisms.
Gathering the Necessary Tools
- Flat-head and Phillips screwdrivers
- Adjustable wrench
- Pliers
- Small hammer
- Ziplock bags (for storing screws and bolts)
Step 1: Removing the Backrest
- Locate the locking levers or clips on the sides or bottom of the backrest.
- Release the levers or clips by either pulling or pushing them.
- Gently lift the backrest upwards to detach it from the main frame.

Photo of a person’s hands locating and releasing the locking levers or clips on the sides of a recliner chair’s backrest.
Step 2: Detaching the Footrest
- With the recliner in an upright position, locate the screws or bolts securing the footrest.
- Using the appropriate screwdriver or wrench, remove these fasteners.
- Once unscrewed, slide the footrest out gently.

Photo of a recliner chair in an upright position with a person’s hands locating the screws or bolts securing the footrest.
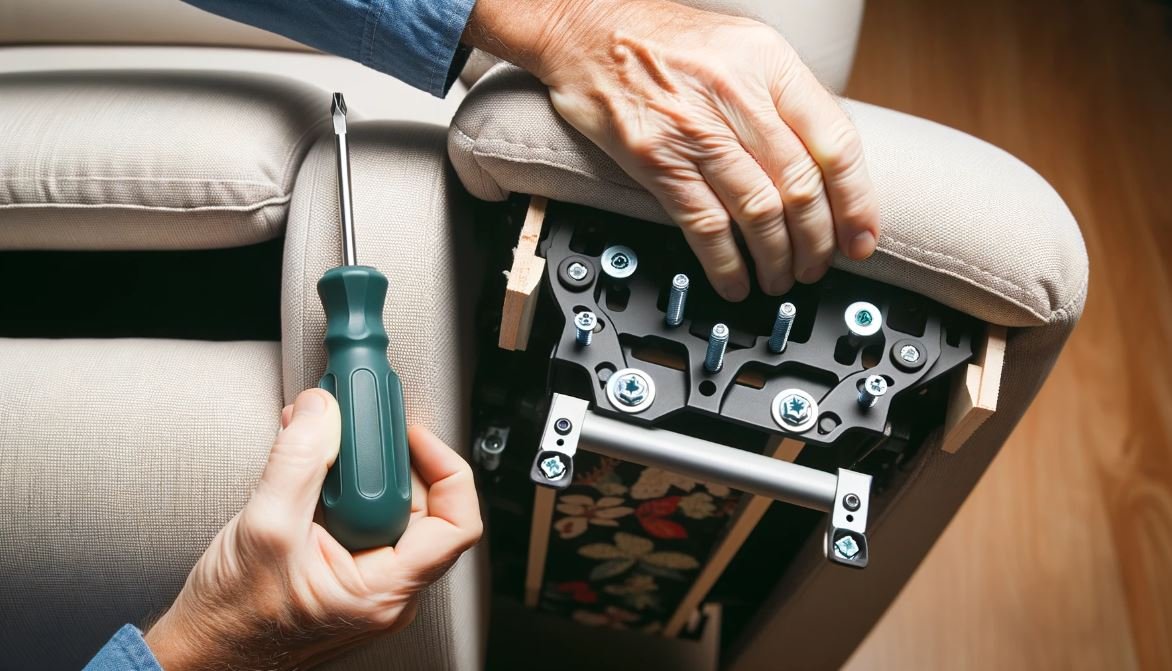
Step 3: Disengaging the Reclining Mechanism
- Find the reclining mechanism, typically situated on the side of the chair.
- Using pliers, detach any springs connected to the mechanism.
- Unscrew or unbolt the mechanism from the chair’s main frame.

Photo of a person using pliers to detach springs connected to the reclining mechanism situated on the side of a recliner chair.
Step 4: Removing the Seat
- Turn the recliner upside down to access the seat’s underside.
- Identify the screws or bolts holding the seat in place.
- Unscrew or unbolt these fasteners and lift the seat away from the frame.

Photo of a recliner chair turned upside down, with a person identifying screws underneath the seat, ready to detach it.
Step 5: Separating the Arms
- On the underside of each arm, locate the screws or bolts.
- Remove these fasteners using your screwdriver or wrench.
- Once unscrewed, gently pull the arms away from the main frame.
Final Tips
- As you remove screws and bolts, place them in Ziplock bags and label them according to their respective parts. This will make reassembly easier.
- Take pictures during the disassembly process. This can serve as a reference when you’re ready to put the chair back together.
- If you find any parts that appear worn out or damaged during disassembly, consider replacing them before reassembling the chair.
Conclusion
Now that you know how to take apart a recliner chair, you can confidently handle tasks like moving, storage, or even deep cleaning. Remember to always prioritize safety and keep track of all the parts and fasteners to ensure a smooth reassembly process.


2 Simple Reasons Why a Load-Bearing Soil Test is Essential

5 Common Reasons Why It Pays to Have a Professional Plumber Install Your Appliances

3 Factors that Highlight Why Movable Walls are a Must-Have in Every Australian Art Gallery

4 Expert Pointers to Consider Before You Install Skylights

Kolin Jones Net Worth 2026: Age, Career, Business, and Wealth
-

 Home Improvement2 months ago
Why One Thermostat Can’t Keep The Whole House Comfortable?
-

 Beauty2 months ago
Understanding the Investment in Hair Treatments
-

 Health2 months ago
Fish Oil Pills Benefits for Brain Function and Mental Focus
-

 Home Improvement2 months ago
Why Your AC Runs All Day but Your House Still Feels Hot